Wednesday, October 19, 2016

Pavtube Blu-ray Ripper Upgraded Supporting Blu-ray MKB v62

It is more and more difficult to decrypt Blu-ray discs because they have higher and higher encryption scheme. For those who love to rip Blu-ray to digital files to stream on portable devices, TVs, game consoles over network, it is the time to upgrade your Blu-ray Ripper to have the power to decrypt the most complex Blu-ray encryption - MKB v62. If you are a user of Pavtube software, you are a lucky man.

Pavtube Upgrade Support MKB v62

Today, Pavtube Studio has upgraded his main 3 Blu-ray ripping tools to support the new Blu-ray encryption MKB v62. If you are the customer of Pavtube product, you can get the upgrade free to get the technology of decrypting MKB v62. Of course, this upgrade won't affect the original functions of Pavtube Blu-ray Rippers to break down Blu-ray encryptions including AACS, BD+,UOP,DRM, HDCP, BD-ROM, Region codes, MKB v61, etc.

These three Pavtube Blu-ray Ripping tools are exactly Pavtube BDMagic, Pavtube ByteCopy, Pavtube Video Converter Ultimate.Now, let’s learn the upgrade and the main features of each Blu-ray ripping tool.

What’s new?

1.support latest Blu-ray MKB v62.

2.fix some bugs.

Key features of ByteCopy

– 1:1 backup BD/DVD with original video structure.

– Main title copy BD/DVD with smaller size.

– Copy BD/DVD to MKV with lossless quality.

– Convert BD/DVD to MP4/MOV/AVI with multiple subtitle/audio streaming.

More functions of ByteCopy is in the review.

Key features of BDMagic

– Full copy and directly copy Blu-ray and DVD

– Convert Blu-ray/DVD to SD/HD MP4, MKV, AVI, etc to NASMedia Server, etc.

– Convert 4K Blu-ray to H.265/HEVC 4K MP4/MKV

– Rip Blu-ray preserving AC3, AAC, DTS audio in stereo, 5.1, 7.1 sound.

More functions of BDMagic is in the review.

Key features of Video Converter Ultimate

– Decrypt Blu-ray and DVD to virtually any SD/HD video

– Convert 4K Blu-ray to SD/HD MP4, WMV, MOV, QuickTime, ProRes for editing in NLE.

– Copy Blu-ray/DVD to M3U8 for HTTP live streaming

– Convert, shrink, compress Blu-ray, DVD to YouTube, FaceBook, Vimeo, Instagram, Google Plus, etc.

More functions of Video Converter Ultimate is in the review.

The Blu-rays you can Decrypt:

You can use Pavtube Blu-ray Ripper to decrypt some new released Blu-ray including: The Walking Dead, Stranger Things, The RevenantThe MartianHannibal TV Series, Game of Throne (1-6), Spectre 007Zootopia, Harry Potter, Independence Day, The Divergent Series: Allegiant, The WalkAvatarHouse of Cards, Bridge of Spies, Mad Max: Fury Road, Room, Spotlight, By the Sea, The Family Fang, Absolution, Roots, Code of Honor, Now You See, The Adderall Diaries, Arch Angels, Shchedrin: The Left-Hander, Sherlock, Ghost Rider / Hellboy, The Da Vinci Code, The Da Vinci Code, Doro: Strong and Proud, etc.

Src: http://www.love-media-player.com/pavtube-upgraded-supporting-mkb-v62/

Tuesday, October 18, 2016

Convert Sony video camera Recordings for Watching on PC

People often use some camcorders like a Sony camcorder to record their happy time. For example, you probably made a video of your randchildren when they were young. To keep these Sony camcorder recordings fine, you sometimes need to transfer them to PC and convert these recordings to MP4 then you can watch these Sony camcorder footage on a computer or a tablet in the future.

Some Sony camcorder recordings would be MXF, AVCHD, XAVC files while some would be MP4/MOV video. Normally, it is difficult to play those raw Sony videos on PC with common media players. So converting all the Sony camcorder recordings to MP4 can make you transfer the footage to SD Card then watching on tablet or just view them on a TV or PC. With Pavtube Video Converter Ultimate, you can easily get the work done.

This video converter can convert any video formats, regardless of high definition 4K recording videos or standard definition footage and make them playable on WMP, VLC, KM Player, etc on PC. At the same time, it can transcode Sony, Canon, GoPro, DJI drone, etc MXF, AVCHD, XAVC, MOV, MP4 to H.264 MP4, H.265 MP4, MKV, WMV, FLV, AVI, 3GP, etc. You can compress 4K video to 1080p while upscale 1080p video to 4K resolution.

You also can add external subtitle to video and replace/mute audio in video. With built-in video editor, you can trim, crop, merge, split video. For Mac users, please use iMedia Converter for Mac.

Free download and install 
  

Other Download: 
- Pavtube old official address: http://www.pavtube.cn/blu-ray-video-converter-ultimate/ 
- Cnet Download: http://download.cnet.com/Pavtube-Video-Converter-Ultimate/3000-2194_4-75938564.html 

How to Convert Sony video camera Recordings for Watching on PC?

Step 1: Add Sony video camera videos.

Open the program, click "File" menu, from its drop-down option, select "Add Video/Audio" to load Sony camcorder video to the program.

Add 4k source video files

Step 2: Choose output file format.

From "Format" bar drop-down list, choose the formats that you want to output for later use. For compatibility consideration, it is idea for you to choose "Common Video" > "H.264 HD Video (*.mp4)" as output file format.

Select output file format

Tip: Open "Profile Settings" window to adjust output video and audio parameter settings according to your own preference. 

Step 3: Convert Sony video camera recording to MP4

After all the settings is completed, hit right-bottom "Convert" button to start to convert Sony video camera recording to MP4.

Once the conversion ends, you can locate the generated MP4 files on output folder and then you can watch them on PC or transfer them to your tablet for watching later.

Related Articles:

Wednesday, October 12, 2016

Backup 3D Blu-ray Discs on Mac (macOS Sierra Included)

The main source of high-quality 3D is via 3D Blu-ray discs. But one of the popular 3D streaming devices - VR Headsets can't play 3D Blu-rays, which leads lmany people to want to copy 3D Blu-ray to 3D MP4. What's more, considering the Blu-ray discs fragile, some are trying to backup 3D Blu-ray on Mac to prevent Blu-ray discs from scratching for over-time using.

There are many Blu-ray Ripping tools in the market that can help you decrypt Blu-ray and copy Blu-ray on Mac, however, not all of them can keep 3D effect when ripping 3D Blu-ray. Even some Blu-ray copy software can preserve 3D effect, they often convert 3D Blu-ray to 3D MKV, 3D MP4. Few of these applications can directly backup 3D Blu-ray on Mac hard drive with 3D effect retained.

Fortunately, Pavtube ByteCopy for Mac works. It helps you easily copy the main movie only from a 3D Blu-ray with original 3D effect on Mac (macOS Sierra Included) and leave out unwanted menus or other extras. On one hand, it can extract 3D M2TS directly from 3D Blu-ray on macOS Sierra, El Capitan, etc, while on the other hand, it can convert 3D Blu-ray to 3D MKV, 3D MP4, 3D AVI, 3D WMV, 3D MOV with excellent 3D effect.

Except backing up 3D Blu-ray movies on your hard drive, you can also use it to rip and convert 3D Blu-ray movies to any 2D/3D format you want or any tablet, smartphone or HD media players, 3D players with optimized video formats. If you’re Windows users, you can turn to Pavtube ByteCopy  to help you directly copy 3D Blu-ray on PC.

The step-by-step instructions below will help you get started using ByteCopy for Mac to directly copy 3D Blu-ray with 3D effect retained on Mac (macOS Sierra Included). Wizard instructions, format presets & batch conversion is provided for easier operation, better output quality & more time saving.

Free download and install: 
 

How to Copy 3D Blu-ray Discs on Mac (macOS Sierra Included)?

Step 1. Import 3D Blu-ray source. 

Click “Load file” button to import the inserted 3D Blu-ray disc from Blu-ray drive. After few second, it will be imported successfully and you can preview the whole movie in the preview window. 


Note: Mention to Blu-ray to computer copy, there are two ways typically – backup and copy 3D Blu-ray movie from the original Blu-ray disc, 1:1 backing up 3D Blu-ray to a folder, and copying 3D Blu-ray movie to a file with only the main movie title. Ane it is wise to choice the later one – 3D Blu-ray main title copy since it helps you get rid of all the unwanted titles in 3D Blu-ray and saves a lot of hard disc storage. 

Step 2. Choose the copy mode. 

A: Now go to “Format” menu to select “Copy” > “Directly Copy For 3D Bluray” from the “Format” menu to copy the . m2ts files only which contains the main movie on your 3D Blu-ray disc. 


For wide streaming choices, you also can choose to rip Blu-ray to 3D MP4, 3D MKV, etc. Click Format and select “MKV Side-by-Side 3D Video(*.mkv)” under 3D Video. In general, mkv is a well-accepted file format for tv, media players or plex and keep up the video quality. Of course, 3D video in .mp4, 3D video in .avi are supported as well. 


Note: Let’s take the 3D Blu-ray Beauty and Beast for instance, the full disc copy containing all titles takes up 40GB, while the main title file only takes up 23462MB. That’s the difference! 

Step 3. Start directly copying 3D Blu-ray disc on Mac

Finally, click “Convert” button to start lossless 3D Blu-ray Backup for Main Movie on Mac. When the copying work is done, you are able to click “Open” button to get the output .m2ts files without any other extra contents. 

With the best 3D Blu-ray Backup and copying tool, you can keep your 3D Blu-ray discs from scratching, manage movies in a more convenient way and watch 3D movies freely at home instead of going to cinema. Just try it now! 

 Related Articles:

Saturday, October 1, 2016

Rip DVD to Kodi on Windows PC

Q: “ Ripping DVDs with Kodi? Just wondering if there's an addon that will allow me to rip a dvd to my library with Kodi. It's not all that hard to rip a DVD and put the video on my server, but if I could find an easy to use DVD ripper addon, it would be great to be able to do it from within Kodi (XBMC).”


Kodi has its supported video formats like MPEG-1, MPEG-2, H.263, MPEG-4 SP and ASP, MPEG-4 AVC (H.264), H.265 (as from Kodi 14) HuffYUV, Indeo, MJPEG, RealVideo, RMVB, Sorenson, WMV, Cinepak, but DVD is not one of them. You need transfer DVD to Kodi accepted files like MKV, and then stream movies to play with Kodi via network. BTW, Pavtube DVDAid is the tool I used to save all my DVD to MKV.


I searched widely, and many guys recommend Pavtube DVD ripping software, it will bring the best audio / video for watching on Kodi. Unlike some free DVD ripping tools like Handbrake and MakeMKV, Pavtube DVDAid is an easy-to-use yet professional software to help you to solve the issue by giving us the ability to store our purchased physical DVD discs to Kodi(XBMC) for smoothly playback in HTPC on Windows.  For those who're using a Mac OS X machine, please try its Pavtube DVDAid for Mac.

Main features:


Hot Search: MOV to Kodi | MP4 to KodiM2TS to Kodi | WMV to Kodi

Note: Today, we're just going to show you the simplest steps to convert DVD to XBMC Kodi file. 

Step 1: Launch DVD Ripper, click "File" to import DVD file into the program.

One of the great things about this DVD to XBMC Kodi file converter is the fact that it can be used to convert multiple files at a time. You can add multiple DVD files to the conversion queue.


Step 2: Select MKV/MP4 as the output format

Click "Output Format" option to reveal the format drop-down list. In the "Format" > "Common Video" column, find "MKV(Matroska) Video (*.mkv)" or "H.264 Video(*.mp4)" or H.264 High Profile Video(*.mp4) and choose it as the output format for using on Kodi (xbmc) and playback on android tablet.


Step 3: Click on "Convert" on the lower right corner to launch the ripping process of DVD to XBMC Kodi. Wait for all the DVD files to be converted.

The two status bars show estimated time about the process. If you plan on walking away from the computer for sleep, tick the "Shut down computer when conversion completed" option. Default is unchecking.

After the conversion complete, simply put the movie from DVD onto XBMC for play back. Enjoy the movie!

If you want to backup your Blu-ray/DVD without quality loss AC3 5.1 audio for HTPC Media center, you can use Pavtube ByteCopy and refer to this guide.
Src: http://techmovieshare.blogspot.com/2015/05/rip-dvd-to-xbmc-kodi.html
Related Articles:

Tuesday, September 20, 2016

Install Plex Media Server Raspberry Pi 3 + Image

raspberry_pi_plexInstall Plex Media Server on Raspberry Pi 3. Thanks to the work of uglymagoo on the Plex forum it is very easy to install Plex using the Synology armv7 package (now it uses the ReadyNAS package).  The previous Raspberry Pi 2 guide became quite long and cluttered, this one aims to be cleaner.

There is a Plex Media Server Raspberry Pi 3 image based on the minimal Raspbian distro Minibian at the bottom of this post with the required modification to force Plex transcoding if you just want to test if Plex on the Raspberry Pi 3 will suit your needs. This tutorial assumes you are running Raspbian Jessie. This how-to also has a section on fixing Plex permissions so if your Plex can’t see your folders then you will be able to solve that problem here.

Install Plex Media Server on Raspberry Pi 3

Installation Checklist

For the best performance for Plex Media Server on the Raspberry Pi 2 refer to this checklist

  • Verify you have the en_US locale
  • Make sure you have libexpat1 installed
  • Do not use WiFi if you want the best result
  • Monitor Plex Media Server and restart it automatically with this guide.
  • Do not use Plex.tv instead use Dynamic DNS and a reverse proxy with this guide to avoid transcoding problems.
  • If you are having transcoding issues try using an older transcoder with this guide.

Pre-Install Requirements

Generate Locales

First we need to verify the en_US locale is enabled

This command lists current locales

locale -a

My output looks like this

C C.UTF-8 en_US.utf8 POSIX

If you don’t have en_US.utf8 you can generate it

To generate the locale edit the locale generator configuration file first to enable the locale

sudo nano /etc/locale.gen

Uncomment this line by deleting the #

# en_US.UTF-8 UTF-8

Ctrl+X, Y and Enter to save

Now generate the locales

sudo locale-gen

If you get the locale-gen cannot be found error this should solve it

echo "export PATH=$PATH:/usr/sbin" >> ~/.profile

Now generate the locales again if locale-gen wasn’t found

sudo locale-gen

Reconfigure locales for good measure (source)

sudo dpkg-reconfigure locales

Now run locale to list them

locale

If you see these errors (on Jessie Lite) follow the next step

locale: Cannot set LC_CTYPE to default locale: No such file or directory locale: Cannot set LC_ALL to default locale: No such file or directory

Open your environment file

sudo nano /etc/environment

Add these lines

LC_ALL=en_US.UTF-8 LANG=en_US.UTF-8

Ctrl+X, Y and Enter to Save

Install Plex Media Server on Raspberry Pi 3 using Repository

Enable https transport or you will get this error: E: The method driver /usr/lib/apt/methods/https could not be found.

sudo apt-get update && sudo apt-get install apt-transport-https binutils -y --force-yes

Grab uglymaoo’s gpg key for his repository

wget -O - https://dev2day.de/pms/dev2day-pms.gpg.key | sudo apt-key add -

Add uglymagoo’s repository

echo "deb https://dev2day.de/pms/ jessie main" | sudo tee /etc/apt/sources.list.d/pms.list

Update your package lists

sudo apt-get update

Install Plex Media Server

sudo apt-get install plexmediaserver -y

Upgrading Plex is as easy as running this command

Note: The repository contains the latest non-Plex Pass version. If you want the Plex Pass version you will have to build it yourself using the manual method 3 outlined here.

sudo apt-get update && sudo apt-get upgrade -y

Check out additional hard drives for your media

Transcoding Tools

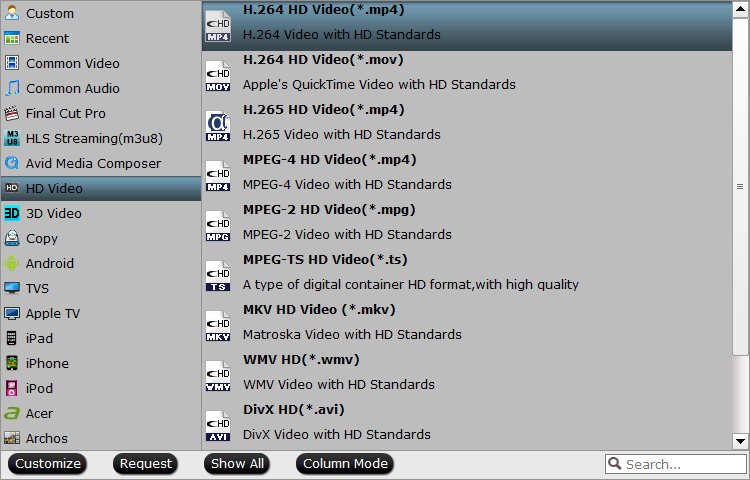
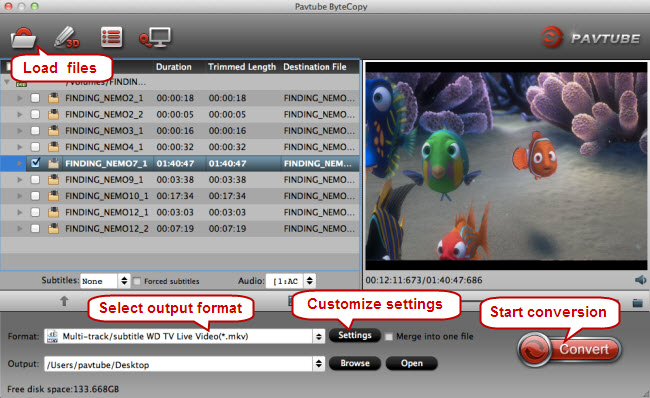
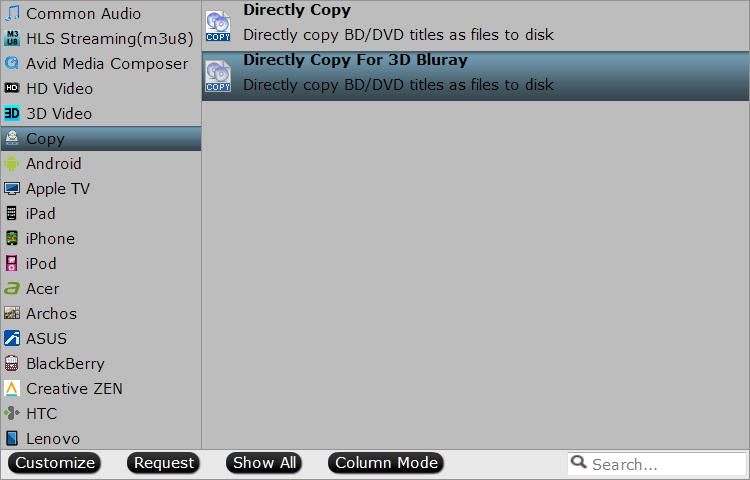
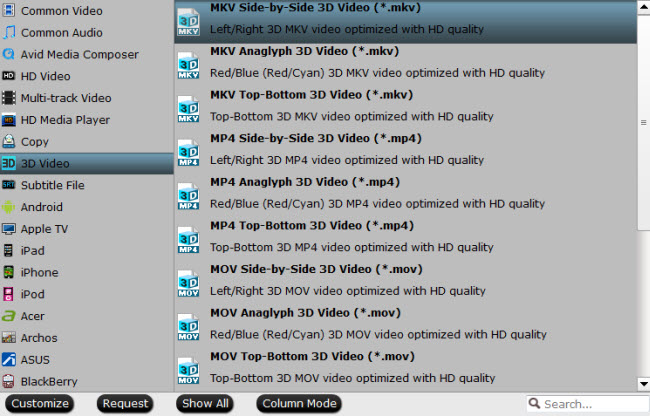
Plex Media Server requires a new libc6 module that you can pull from the jessie repo (thanks again to uglymagoo). This part may not necessary if you used the precompiled deb package at the top. Sometimes, if your end devices are low, your Plex can't pass-through some videos to play, you can transcode the video in advance with some video transcoders and put the converted video in sharing folder of Plex in advance.

Install libexpat1 for help playing in the Android app

sudo apt-get install libexpat1 -y

Fix Plex Permission Issues

If Plex isn’t reading your drives or folders you can do one of two things, change the permissions of your external storage or change the user Plex is running as (which could mean you need to rescan for metadata).

First try adding your plex user to your regular user’s group that owns the mount point for your hard drive

sudo usermod -aG pi plex

Then add your regular user to the plex group if the plex group exists

sudo usermod -aG plex pi

Then set the permissions for the folder containing your media to 775 so the plex in the user’s group can read them

sudo chmod -R 775 /folder/with/media

If that still fails you can change the permissions where /mnt/usbstorage is your mount path for your hard drive so everybody can read, write and execute

sudo chmod -R 777 /mnt/usbstorage

Alternatively you can change the user Plex runs as to your pi user

To change which user Plex runs as, open this file

sudo nano /etc/default/plexmediaserver

Change this line, replace plex with your username you use to log on or the owner of the mounted drive, most likely pi

PLEX_MEDIA_SERVER_USER=pi

Ctrl+X, Y and Enter to save

Change the owner of your Plex folders to the user you are changing

sudo chown -R pi:pi /var/lib/plexmediaserver

Then restart your Plex server

sudo service plexmediaserver restart

If Plex still isn’t working see the manual installation guide.

Raspberry Pi 3 Plex Media Server Image

If you cannot see the unlocker whitelist this site in AdBlock

Raspberry Pi Plex Media Server Images

Spread the knowledge to get the Pi goodness


For the Plex Media Server image, login with root, password htpcguides and use raspi-config to expand the file system, you can install WiFi drivers if they are not included in the kernel
apt-get install firmware-linux-nonfree -y

Enjoy Plex Media Server on your Raspberry Pi 3

Source

If you want to stream Blu-ray with Plex on your Raspberry Pi 3 based multimedia devices, here are some tutorials:

Below are some video tools that help you get more entertainment on Plex:

You Cloud Download Directly

Pavtube Video Converter Ultimate

Pavtube Video Converter Ultimate

An efficient, fast, safe, all-in-one Blu-ray DVD Backup & ripper and HD Video Converter

Free Trial Buy now

Pavtube ByteCopy

Pavtube ByteCopy

An Efficient, Safe, Fast, Easy-to-use Blu-ray DVD converter and Retain multiple audio tracks & subtitles

Free Trial Buy now

Pavtube BDMagic

Pavtube BDMagic

Pavtube BDMagic is a easily and powerfully BD tool to make Blu-ray movie enjoying anywhere anytime as you like.

Free Trial Buy now

Pavtube DVDAid

Pavtube DVDAid

A professional yet easy-to-use DVD backing up and ripping tool.

Free Trial Buy now


Related Articles: